

Registry Editor in the Windows operating system is quite a powerful tool and if you don’t want users on your system to access it, you can disable it. One of the easiest way to disable it is using the Local Group Policy Editor.
In this guide, we will show you a step-by-step process on how to disable Registry Editor on your Windows 10 computer using the Local Group Policy Editor. Do note that the Group Policy Editor is only available for the Windows 10 Pro and Enterprise editions and not the Windows 10 Home.
Disable Registry Editor using Group Policy
Step 1: First of all, open the Local Group Policy Editor. To do so, press the Win + R keys on your keyboard and in the Run window that opens, type “gpedit.msc” and press the Ok button or Enter key.
Step 2: In the Local Group Policy Editor, go to the following location:
User Configuration -> Administrative Templates -> System
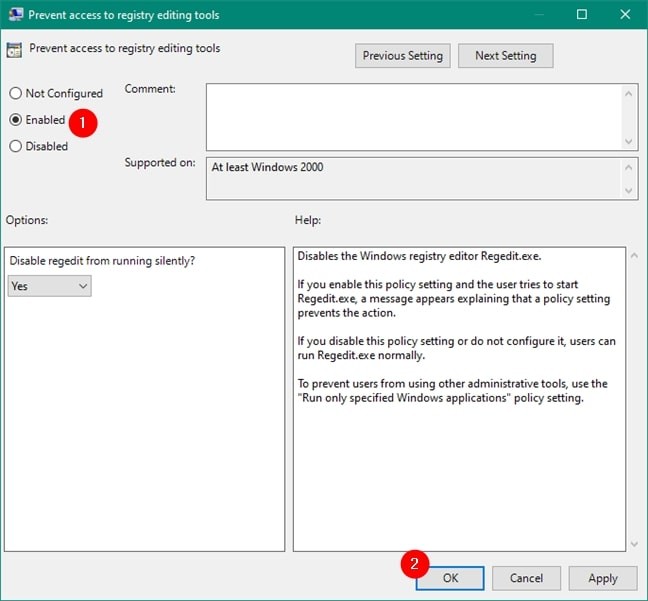
Step 3: Now, double-click on the “Prevent access to registry editing tools” from the right-side pane.
Step 4: In the new window that opens, change the settings to “Enabled” and then click on “Apply” or “Ok”.
That’s it. The Registry Editor has not been disabled on your system. Now, whenever a user tries to open the tool, they will get a message saying “Registry Editor has been disabled by your administrator.”
Do note that once you have disabled the Registry Editor using the above method, no one can access it afterward, including all the standard users and administrators on the computer. To re-enable, just follow the same steps and change the status to “Disabled” or “Not Configured.”
This article is auto-generated by Algorithm Source: www.mobigyaan.com