

Windows 10 comes with support for several advanced tools and one such tool is the powercfg. It is a handy command-line tool that allows users to manage many aspects of power plans or schemes on the computer.
Using this tool, the user can create, edit, and delete power plans on the computer, along with customizing or disabling several power-related features. In this step-by-step guide, we will show how to use the powercfg tool in the Command Prompt to Enable Hibernation in Windows 10.
How to Enable Hibernation in Windows 10 through Command Prompt
Step 1: Open the Command Prompt in Administrator mode. For this, open the Start menu and search for the term Command Prompt. In the search results, right-click on the app and select “Run as Administrator.”
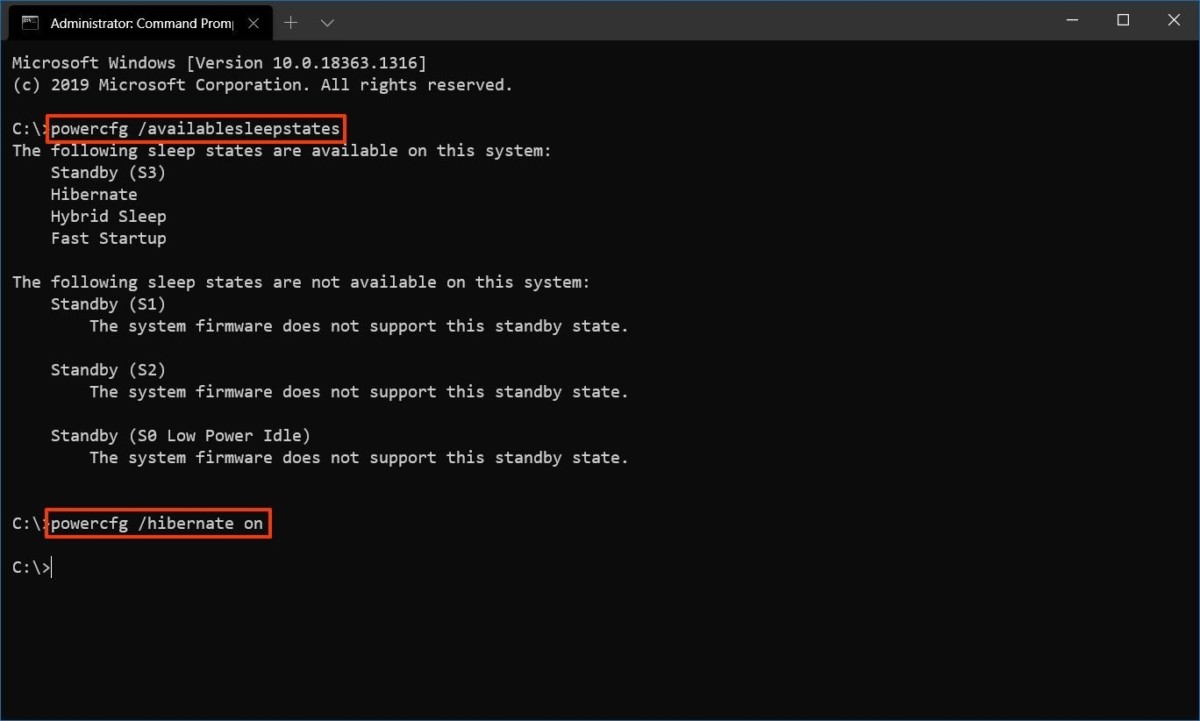
Step 2: In the Command Prompt, type in the following command to confirm is hibernation is supported on your system.
powercfg /availablesleepstates
If Hibernate shows up in the available states on your computer, then you will be able to enable the feature.
Step 3: To enable Hibernation on your Windows 10 computer, type the following command in the Command Prompt.
powercfg /hibernate on
That’s it. Once the above-mentioned steps have been followed, the hibernation mode on the Windows 10-powered computer will be enabled. You can follow the same steps and change the word “on” to “off” in Step 3 to disable this mode.
This article is auto-generated by Algorithm Source: www.mobigyaan.com