

On a system powered by Windows 10 operating system, a partition is a logical division of the space available on a physical storage drive. As a drive can hold many partitions, you may need to reorganize them.
So, if you no longer need a particular partition or want to increase the space of another partition, you will need to delete that partition. There are several different ways to do that but in this guide, we will take the help of PowerShell.
Here is a step-by-step guide on how you can easily delete a partition on your Windows 10 computer using the PowerShell tool.
Remove partition in Windows 10 using PowerShell
Step 1: Open the Start menu and search for PowerShell. From the search result, right-click on PowerShell and select the Run as Administrator option.
Step 2: Now, in the PowerShell window, enter the following command:
Get-Volume
Step 3: To remove a particular partition, enter the following command:
Remove-Partition -DriveLetter PARTITION-LETTER
For instance, you want to remove Drive E from your computer, just enter the command as mentioned below:
Remove-Partition -DriverLetter E
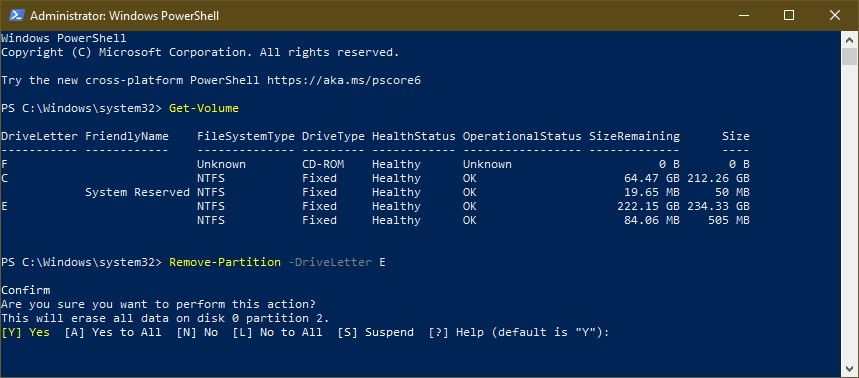
Step 4: You will now be asked to confirm the action. Type Y and then hit the Enter key to confirm the deletion.
Once you have completed all the steps mentioned above, the selected partition will be removed, and the space on the drive will show as unallocated.
This article is auto-generated by Algorithm Source: www.mobigyaan.com