

If you are an avid PC Gamer I am sure you must be using Steam on your PC. Many platforms allow you to buy games however none of them provide a good user experience like Steam. In addition to this, Steam is one of the biggest Gaming platforms out there and it has all the games you need. From the best selling AAA titles to some classic Indie games Steam has it all.
It also keeps coming up with various sales in every few months that allows users to buy their favorite games at a cheaper price. Mostly everyone who is using Steam has installed the Windows version of Steam on their system, and sometimes these users face problems while launching the App. Hence, to solve that, we have made a list of the Top 5 ways that can help you to fix Steam not launching an error on your Windows 10 PC. Without waiting further, let’s get started.
1) Clear Steam Cache and Data
Every time we have problems with an App on our Android Smartphone we often clear the Cache and Data expecting that it would fix the problem and it most cases it does the work. Windows 10 doesn’t come with an App that allows you to clear the Cache and Data for a specific app however it can still be done using the Run app. Have a look at the steps below to see how it’s done.
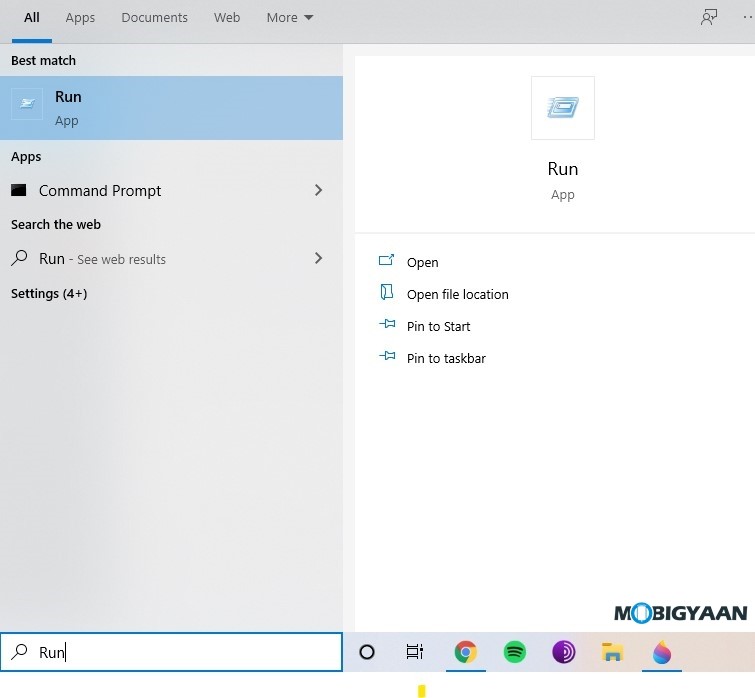
Step 1: Search for Run in your search bar or simply press Windows Key+R to bring it up.
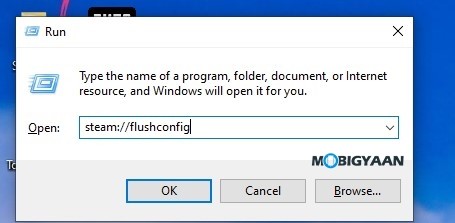
Step 2: Type “steam://flushconfig” in the open box and press the “Ok” button to run the command.
That’s all doing this will clear the Steam Cache and Data from your Windows 10 PC. It is to be noted that once you do this, Steam will ask you to login with your username and password again.
2) Kill the Process and Restart Steam
If you started the Steam App multiple times or forgot to close it in a proper way when you used it last time there are chances that it may have encountered a problem and restarting can help you to solve this. To kill the process and restart Steam all you have to do is:
Step 1: Bring up Task Manager on your Windows 10 System by pressing Ctrl+Shift+Esc keys on your keyboard.
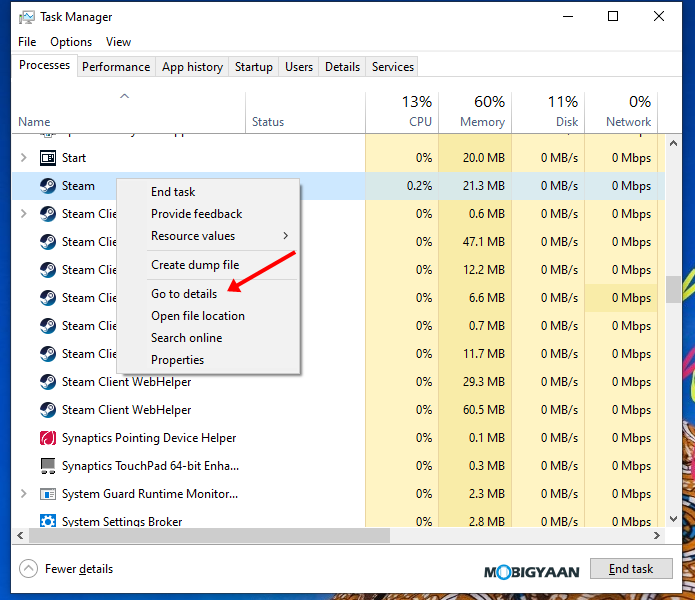
Step 2: Search for “Steam” or “Steam Client Service” in the Processes Section of your Windows Task Manager.
Step 3: Right-click on the process and select “Go to details” to continue with the process.
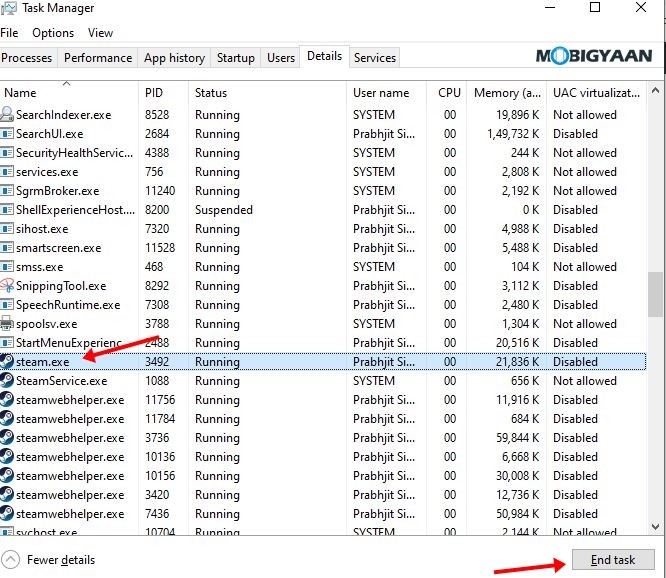
Step 4: Select “Steam” or “Steam Service” from the details section and click on “End task” to force close them.
Step 5: Start Steam again and it should be running without any problems.
3) Use Steam on your Web Browser or Mobile App
Steam can be easily accessed from a Web Browser and In addition to this, it also has its mobile app on Android and iOS. While the mobile app and web browser version of Steam doesn’t allow you to play games, it can still be used as a temporary fix for chatting with your friends and buying new games on your Steam Account. Have a look at the steps below to see how you can use Steam on your Web Browser and Mobile App.
For Web Version:
- Open Google Chrome or any other Web browser on your PC and head to Steam Store.
For Mobile App:
- Download the Steam Android or iOS app on your device and log in with your username and password.
- Once done, Simply click on Store from the sidebar to shop games or start chatting with your friends directly.
4) Reinstall Steam
If none of the methods worked for you so far then Reinstalling can also help you to fix the Steam not opening on Windows 10 error. Since all your Game Progress is saved on cloud servers, you won’t be losing any of your game data. In addition to this, when you uninstall Steam it doesn’t delete your Game files which means that you won’t have to reinstall the games you play. To reinstall Steam on your PC all you have to do is:
- Follow the standard uninstall process and remove steam from your PC.
- Head to this link and download the latest version of Steam.
- Run the setup and reinstall Steam on your Windows 10 PC.
5) Check External Storage Drives
There may be a chance that you installed Steam on an External Storage drive instead of your internal SSD or Hardisk and it may be causing the runtime error for steam. To fix this issue make sure you check your external storage devices and move the program files in your internal HDD/SSD. Once done, Steam will start working normally on your PC.
Wrapping Up
That’s all, folks! If you liked this guide, then make sure you check out more Windows guides, tutorials, tips, and tricks. You can also follow us on our Social Media profiles to get updates on the latest smartphones and tech.
Instagram | Facebook | Twitter | Youtube | TikTok
This article is auto-generated by Algorithm Source: www.mobigyaan.com